Whiteboard shapes
Whiteboard shapes — including sticky notes, geometric shapes and text shapes — provide a flexible set of visual elements you can use to annotate, organize, and collaborate directly on your BPMN diagrams.
These shapes appear on the canvas but aren’t included in the underlying BPMN model, so you can be creative without affecting your process.
Add a whiteboard shape
-
In the toolbar, click
to open the Navigation panel. -
In the Elements tab, locate the Whiteboard shapes section.
-
Select a shape and drag and drop it onto the diagram.
Customize and edit shapes
When you select a shape or a group of shapes, an action toolbar appears directly above it. Use this toolbar to style the appearance, add text, arrange or ungroup shapes.
Add and format text
Add notes directly onto any whiteboard shape or use the standalone text shape, then format the text using the action toolbar.
-
For standard shapes: Double-click inside the shape. A cursor appears where you can start typing.
-
For text shape: Double-click the text shape on the canvas to edit the existing text.
To format text:
-
Select the text you want to format.
-
Use the action toolbar to change the font, size, color, alignment, and styling.
Change fill and border colors
Customize the color of your shapes to help them stand out or to categorize information.
-
Select a shape to open the action toolbar.
-
Click
 to choose an interior color, or click
  to change the outline color of the shape.
 -
Select a color from the palette, or click Custom to define a specific color value.
Change shape type
Quickly change a shape for a different one directly from the action toolbar.
-
Select the shape you want to change.
-
In the action toolbar, click
 .
. -
Select a new shape from the available options.
Transform shapes
Manually adjust the size and orientation of any whiteboard shape to fit your diagram’s layout.
-
Select a shape to open the action toolbar.
-
Resize: Select the shape and drag any corner handle to change its dimensions.
-
Rotate: Select the shape, click and hold the rotate icon
, and drag to the desired angle.
-
Arrange and layer shapes
Manage how shapes overlap on the canvas.
-
Select a shape to open the action toolbar.
-
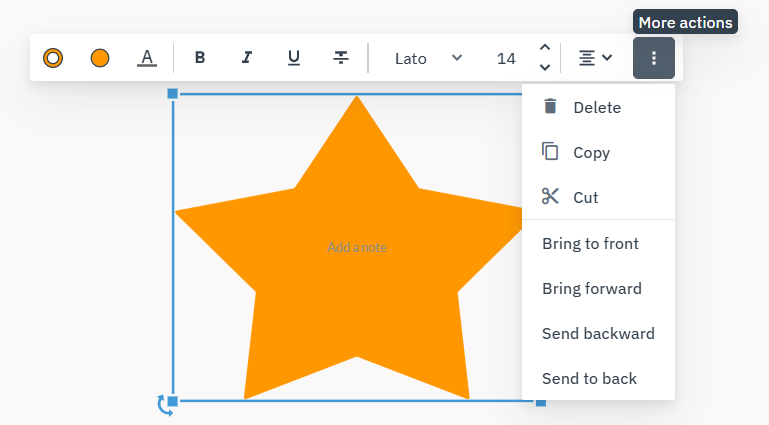
Click
and select an action: -
Bring Forward: Move the shape up one layer.
-
Bring to Front: Move the shape to the very top layer.
-
Send Backward: Move the shape down one layer.
-
Send to Back: Move the shape to the bottom layer.
-
Group and ungroup shapes
Group multiple whiteboard shapes to move, resize, rotate, or change their colors or text all at once.
-
Select the shapes you want to group.
Hold Ctrl and click each shape, or use the rectangular selection tool if the shapes are clear of other process elements.
-
In the action toolbar, click
 .
.
To ungroup shapes:
-
Select the grouped shapes.
-
In the action toolbar, click
 .
.
Edit and delete shapes
Use the action toolbar to quickly duplicate, move, or remove elements from a diagram.
-
Select a shape to open the action toolbar.
-
Click
and select an action: -
Delete: Remove the shape from the diagram.
-
Copy: Copy the shape to your clipboard.
-
Cut: Remove the shape from the canvas and copy it to your clipboard.
-