Model a data flow
Data flows define how data moves between activities and events and data elements in a process. Data Associations carry this data across your diagram.
A Data Association connects a data element (such as a data object reference, data input, data output, or data store reference) at one end as its source or target, linking it to an activity or event at the other end.
You can model and edit a data flow using the Data flow tool or create it manually.
Data flow tool
The Data flow tool simplifies the process by guiding you through creation, automatically validating associations, and highlighting errors before execution.
Before you begin
-
Define the data inputs and data outputs for each activity or event.
-
Ensure that data types (item definitions) match between connected elements.
Data flow from one activity or event
You can model a data flow starting with a single activity or event and associate it with multiple data inputs and/or data outputs.
The following is an example that starts with a single user task and creates a data input association and one data output association.
The following procedure is an example. It starts with the ‘Sign the form’ user task and creates one data input association (‘Signature’) and one data output association (‘Approval’).
-
Select the user task.
-
In the toolbar, click
and select Create Data Input Associations. 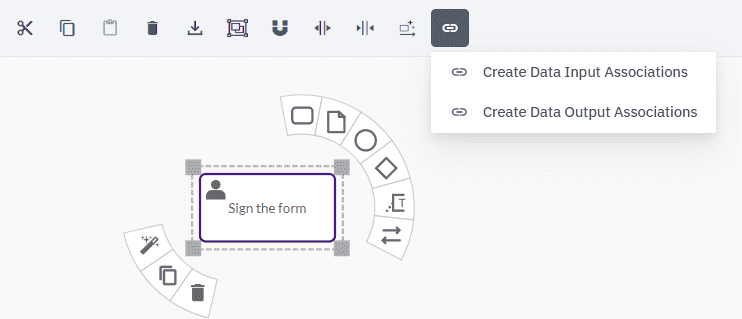
-
Select a data input association for the user task, then click Create.
-
Select the user task again.
-
In the toolbar, click
and select Create Data Output Associations. -
Select a data output association for the user task, then click Create.
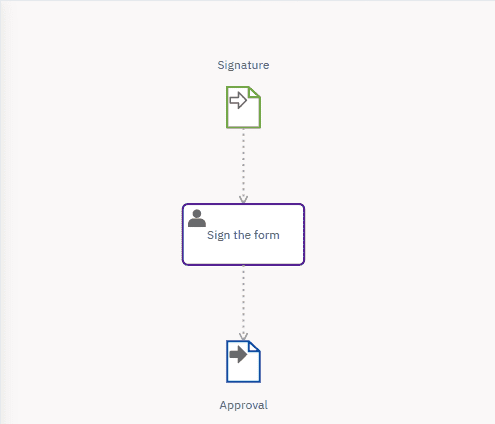
The data flow should look something like this:
Data flow between 2 activities or events
The following procedure is an example of how to model a data flow between two user tasks.
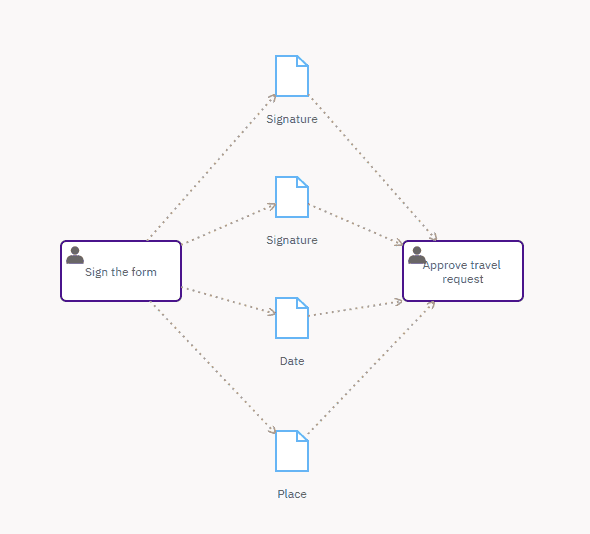
The example maps the flow of data that starts at the signing of a travel request form (‘Sign the form’) and ends with the request being approved (‘Approve travel request’). The aim is to associate the data outputs of ‘Sign the form’ with the data inputs of ‘Approve travel request’ and associate them using data elements — in this example, data object references. The data inputs and data outputs have previously been defined.
-
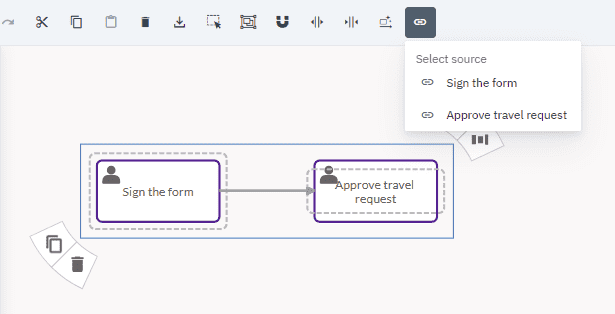
Select the two user tasks.
-
In the toolbar, click
and select the source of the data flow. The source, Sign the form, is the starting point for the flow of data.
The Data flow tool is disabled until you select an activity or event.
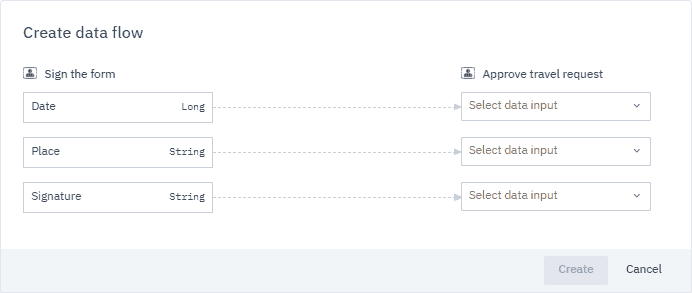
In the dialog box that opens, data associations are automatically created between the data outputs and data inputs of the two tasks.
-
Select the data inputs to be associated with the data outputs.
When you select a data input, a data element is automatically created on the data output of the task.
-
Select the data element type.
In this example, it’s a data object reference.
Type the name of a data element in the field to find it faster.
You can also create a data element by typing a name in the field and selecting the type of data element.
-
Once you’ve associated all the data inputs with data outputs, click Create.
The data flow should look something like this:
Manually model a data flow
To manually model a data flow, define these elements in your diagram:
- The data element
- The activity or event
- The data association connecting the data element to the activity or event
Before you configure a data association, you need a data element and an activity or event in the diagram that has a data association between them.
The order set out in this procedure is purely for the purpose of example. You can define the data association, data element and activity or event in the order you prefer.
-
Define the data element
Select the data element and define its attributes.
If you use a data object reference or a data store reference, you need to associate it with a data object or a data store.
You can create a new data object or data store in the Attributes of the data object reference and data store reference:
-
Click New.
-
In the panel that opens, fill in these Name and (optional) Description fields and specify the Data Type (Item Definition) and Default value.
-
Click Create and select.
-
-
Define the data association
The direction of the arrowhead of the data association determines whether the data element is a source for, or a target of, the activity or event.
In the Attributes tab of the data association:
- Click
and select the Source Reference or the Target Reference from the dropdown list or create a new reference.
To create a new reference:
-
Click New.
-
In the panel that opens, fill in the Name and (optional) Description fields and specify the Data Type.
-
Click Create and select.
- Click