DMN Components
Components are what you use to create a Decision Requirements Diagram (DRD). They’re the building blocks for modeling decisions.
In DMN, there are 4 elements, 3 requirements, and 2 artifacts. You find information on specific components and their attributes in the DMN Component Reference.
| Component Type | Component | Description | Notation |
|---|---|---|---|
| Element | Decision | Determines an output value based on Input Data and a defined decision logic. | 

|
| Input Data | The information used as an input by one or more Decisions in order to determine the output value. | 

|
|
| Business Knowledge Model | A function that encapsulates business knowledge. | 

|
|
| Knowledge Source | An authority for a Business Knowledge Model or Decision. | 

|
|
| Requirement | Information Requirement | Connects an Input Data or Decision to another Decision node that requires the information. | 

|
| Knowledge Requirement | Connects a Business Knowledge Model to a Decision or to another Business Knowledge Model that invokes the decision logic. | 

|
|
| Authority Requirement | Connects an Input Data or a Decision to a dependent Knowledge Source or from a Knowledge Source to a Decision, Business Knowledge Model, or another Knowledge Source. | 

|
|
| Artifact | Text Annotation | Provides additional information about an Input Data, Decision, Business Knowledge Model or Knowledge Source. | 

|
| Association | Connects an Input Data, Decision, Business Knowledge Model or Knowledge Source to a Text Annotation. | 

|
Component attributes
Every component has a set of attributes you can edit. You edit them in the Attributes panel.
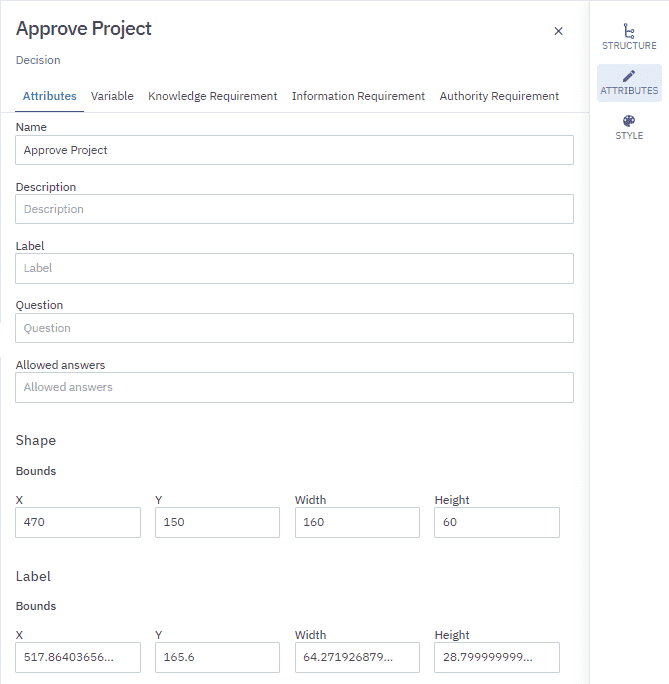
The Attributes panel has a tab menu. Every component has an Attributes tab. Depending on the component, the Attributes panel can have additional Attribute tabs. For example, a Decision has an Attributes tab and a Variable, Knowledge Requirement, Information Requirement and Authority Requirement tab.
Some tabs in the Attributes panel are shortcuts to global Decision Definitions. Definitions is where you define the parts of a decision that don’t have a graphical representation.
To open the Attributes panel:
- Select the component in the diagram, and in the Configuration panel, click Attributes.


Add components
There are several ways to add components to a diagram.
-
From the Navigation panel
-
Using the Ring
-
Using the Magnetic Edge tool
-
By copying and pasting.
From the Navigation panel
The Navigation panel contains all the components you can use in a diagram.
To add a component:
-
In the toolbar, click
to open the Navigation panel. -
Select a component, then drag and drop it onto the diagram.
The Ring
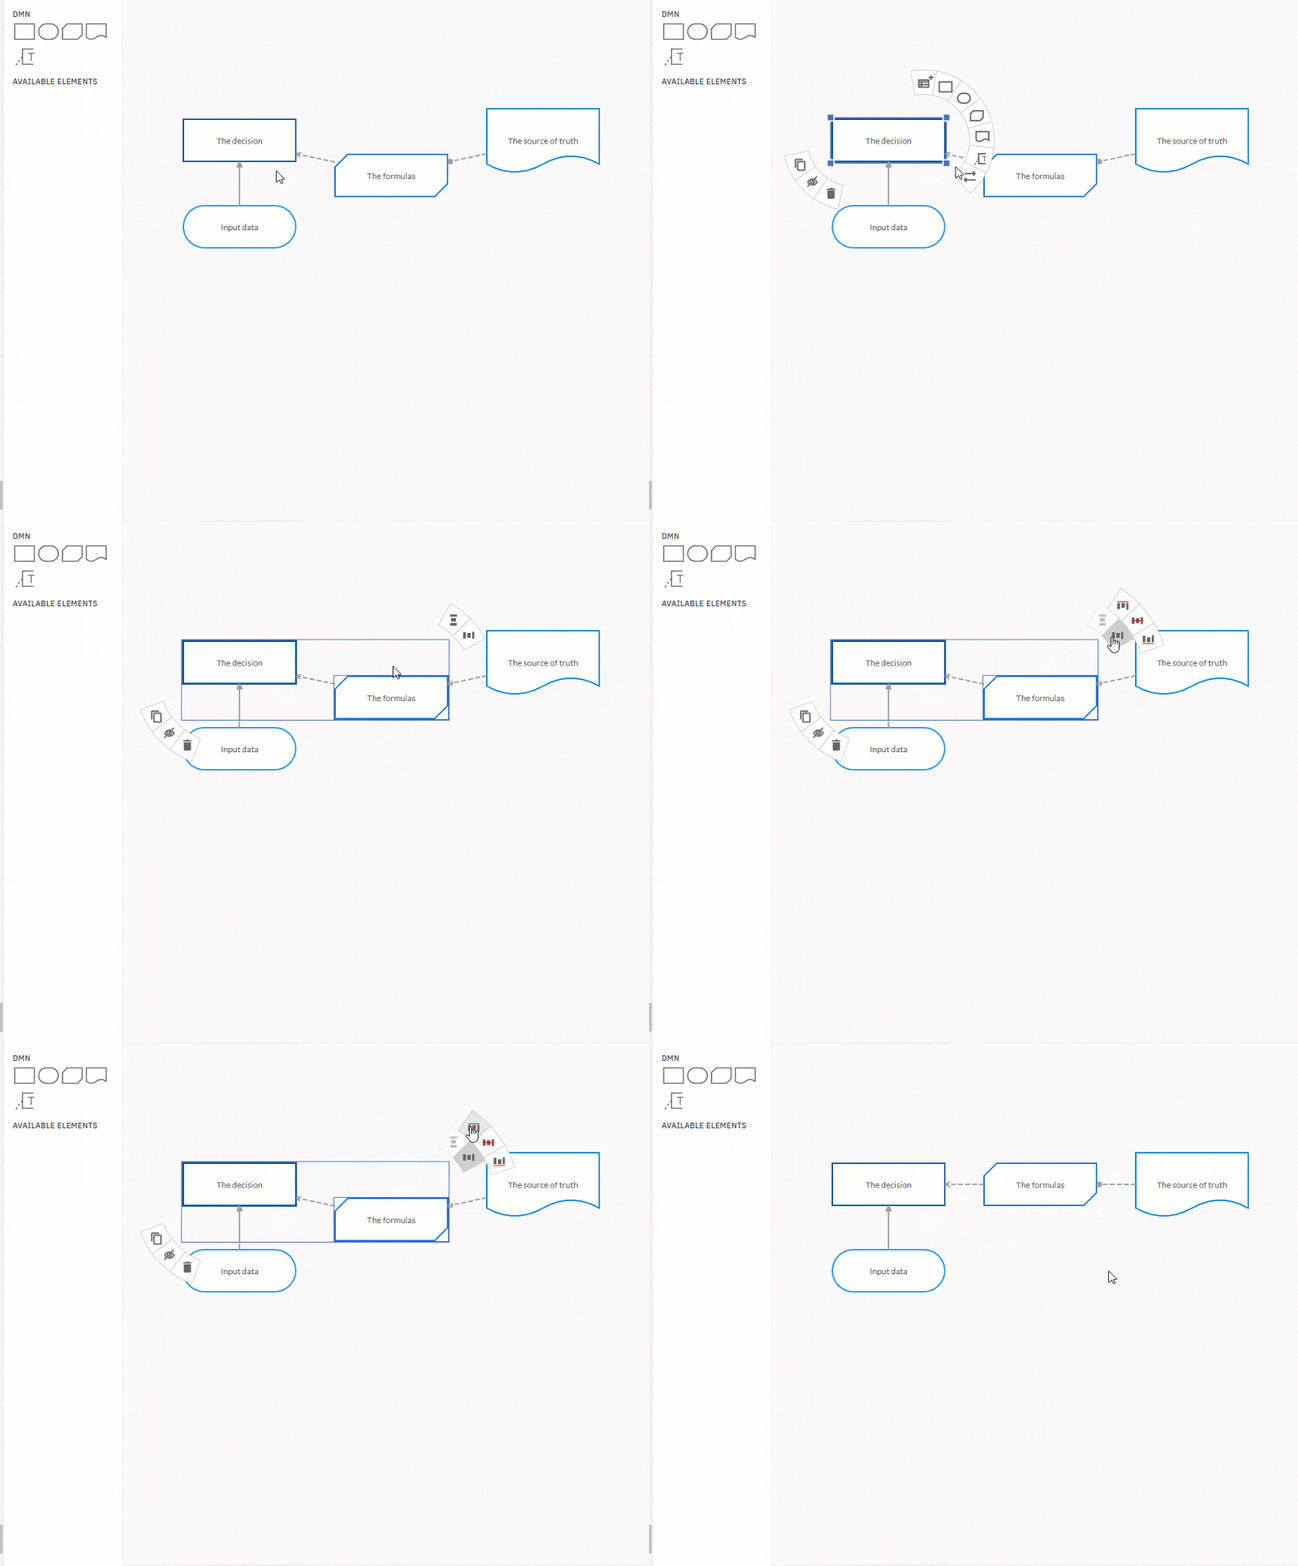
The Ring is an interactive context menu that helps you to model decisions faster than manually dragging and dropping components onto a diagram.
The Ring has two parts: a right menu for adding and automatically connecting components, and a left menu with tools to edit a component. The actions and tools available in the Ring depend on the component you select. Hover over icons to see tooltips that describe what they do.
Here’s an example of how to add a Decision and connect it to a Business Knowledge Model using the Ring:
-
Right-click anywhere on the diagram to open the Ring.
-
In the right Ring menu, select the Decision icon.
The Ring remains open, allowing you to continue working.
-
Select the Business Knowledge Model icon from the menu.
The Ring will automatically connect the Decision to the Business Knowledge Model. Alternatively, you can hold and drag the component into position.
Copy and paste
You can add components by copying an existing one and pasting it elsewhere.
-
Select the component you want to copy.
-
In the left Ring menu, click
. -
Click an empty space on the diagram to open the Ring, then click
.
Other ways to copy and paste
-
Toolbar: Use the copy
and paste actions. -
Keyboard shortcuts: Ctrl + C to copy and Ctrl + V to paste.
Magnetic edge
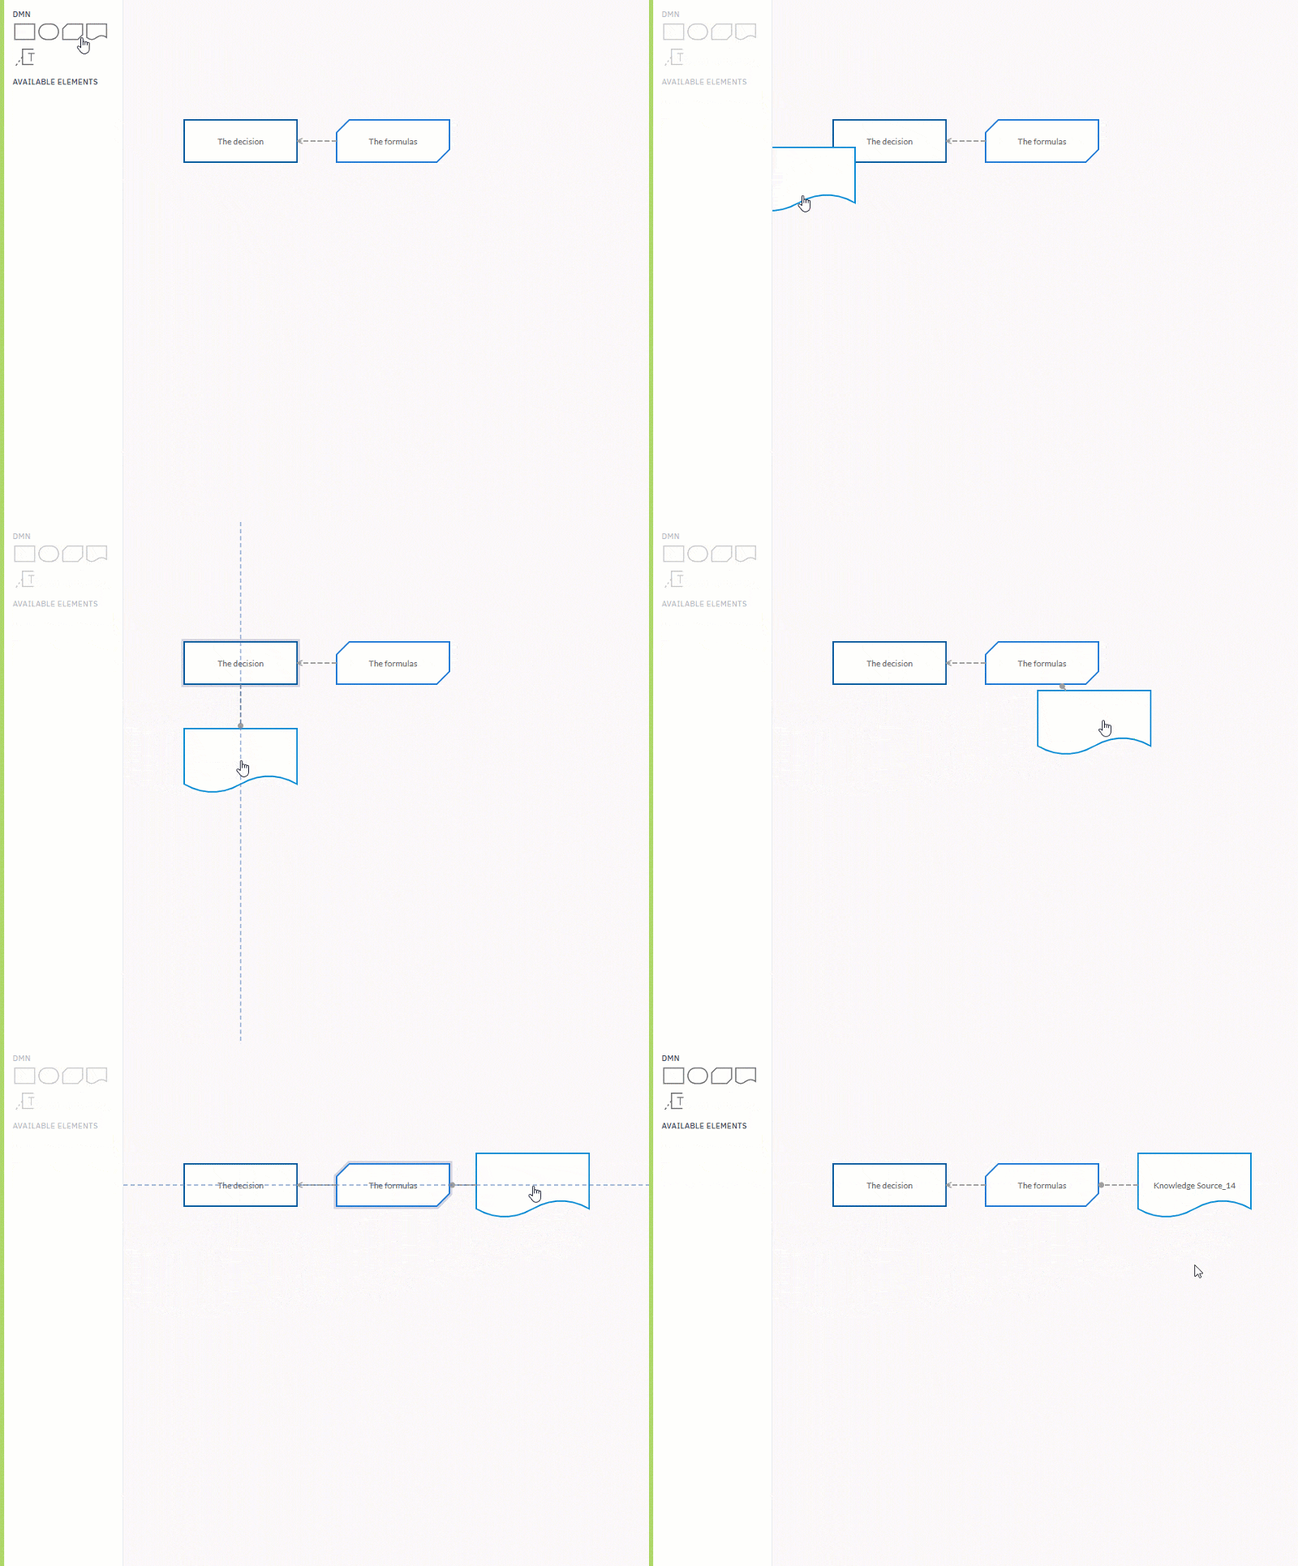
The Magnetic Edge tool automatically connects components as you drag and drop them onto your diagram. Think of it like a magnet; it connects to the closest component.
-
In the toolbar, click
. -
Drag a component from the Navigation panel and drop it onto the diagram.
-
Drag another component close to the first one. The Magnetic Ede tool will automatically connect them when they’re positioned correctly.
To deactivate the tool:
- In the toolbar, click
 .
.
Hide components
You can hide components in a diagram when you want to focus on an area of the decision tree without the distraction of unwanted components.
When you hide a component, the marker  is added to the component the hidden component was connected to.
The components you hide are placed in the Navigation panel under the Available elements section.
You can restore a hidden component. If it was connected to other components, the links are automatically restored.
To hide a component:
-
Select the component.
-
In the Ring, click
.
To restore a hidden component to a diagram:
- In the Navigation panel, in Available elements, select the component, hold, then drag and drop it onto the diagram.
Tools for editing components
Cardanit has several tools that enable you to edit the components in a diagram.
You can use them to create space between components, align them, select components, delete them and more.
Edit with the Ring
You can use the left menu of the Ring to edit components.
Depending on the components you select, the Ring contains the editing tools you can use for that component.
Hover over icons to see tooltips that help you understand the actions they perform.
| Tool | Icon | Description |
|---|---|---|
| Copy | Copy the component. | |
| Hide | Hide the component. | |
| Paste | Paste the component. | |
| Delete | Delete the component. | |
| Add label |  |
Edit a Text Annotation. |
| Undo | Undo actions. | |
| Redo | Redo actions. |
Create space tool
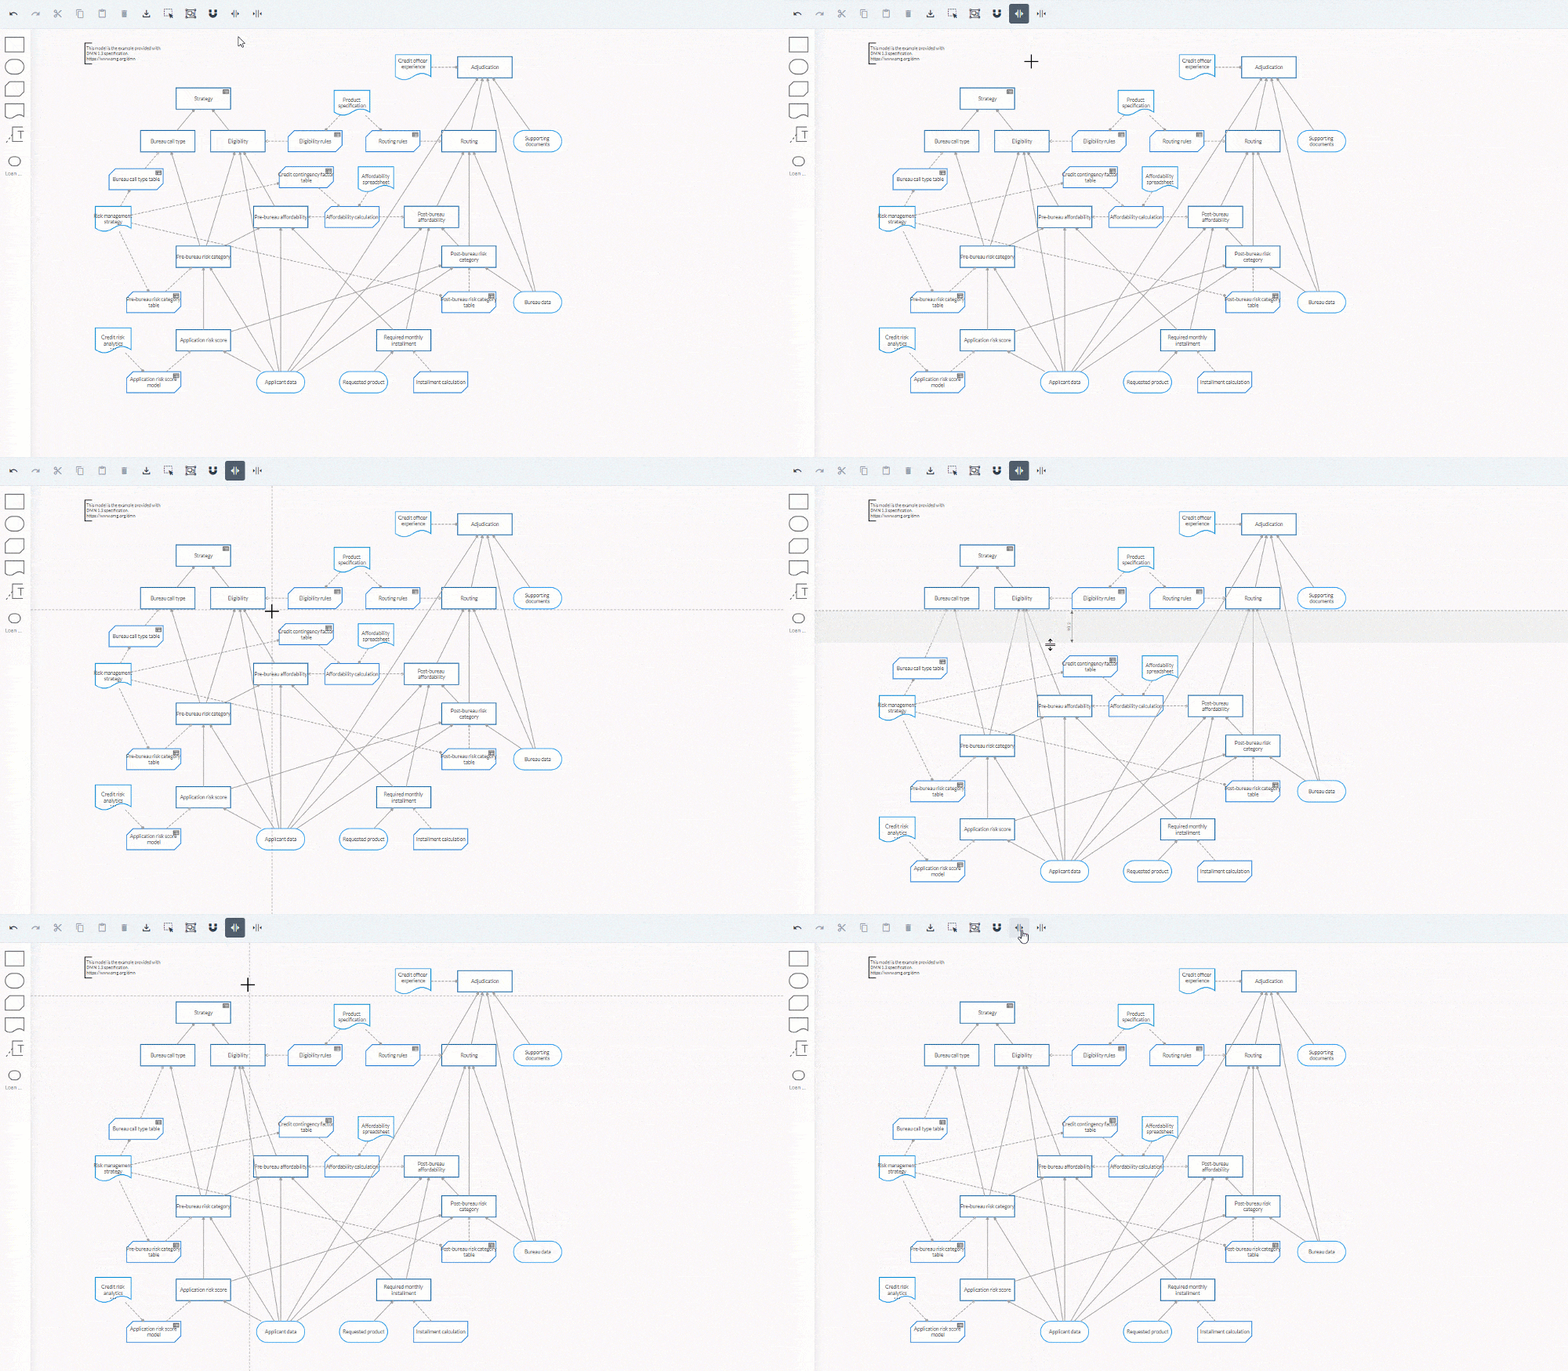
You can use the create space and remove space tools if you need to create space for additional components or reduce the diagram size.
Create space
-
Click
. The moment you activate the tool, guides appear in the diagram.
-
Position the pointer over the area of the diagram where you want to create space.
-
Click, hold and drag in the direction you need to create space — horizontally or vertically — then release.
To deactivate the tool, click
again or press ESC. 

Remove space
-
Click
. -
Position the pointer over the area where you want to remove space.
-
Click, hold and drag in the direction you need to remove space — horizontally or vertically — then release.
To deactivate the tool, click
again or press ESC.
Select components
There are several ways to select components in a diagram.
You can select an component by clicking on it or by using the Rectangular Selection or Select All tools.
Once you’ve selected the components you can move, copy, delete or align them.
Rectangular selection tool
This tool enables you to select multiple components in the diagram.
-
In the Toolbar, click
 .
. -
Click and drag the pointer to define an area around the components you want to select.
To deactivate the tool, click
 again or press ESC.
Select all tool
This tool enables you to select all the components in the diagram.
-
In the toolbar, click
 .
.To deactivate the tool, click
 again or press ESC.
Align components
You can align and distribute one or multiple components using the Ring or align and distribute them manually using guides and margins.
Align with the Ring
Use the Ring to align components vertically or horizontally.
When you align components vertically you can also align them to the right, left and in the center.
When you align components horizontally you can also align them at the top, bottom or in the middle.
-
Select the components you want to align.
-
Use the alignment options in the right Ring menu.


Align manually
If you’re adding components from the Navigation panel you can use the guides that appear to help you align them.
Vertical and horizontal guides appear when you drag and drop a component near another element. Margins also appear to help you distribute them evenly.


Delete components
To delete components in a diagram, select the component or components:
-
In the toolbar, click
. -
In the Ring,
. -
Use the keyboard shortcut Ctrl + X.
Undo and redo
When you’re adding components to a diagram and editing them it can be useful to undo and redo your actions.
You find the undo